
Among the services we offer on our website, you will find high-end retouching. Like most technical terms, its exact meaning might not be entirely clear to those outside the industry. Simply put, retouching or post-production is one of the three core phases that make up any professional commercial photoshoot, whether it involves still-life, portraits, or interior design photography.
To better understand how a commercial project comes to life, let’s break down these three distinct phases:
Pre-production: this is the planning stage. We work closely with the client to define the visual style of the shoot, select the ideal location, coordinate the creative team, and map out the logistics.
Production: this is the execution phase. We translate everything planned during pre-production into physical images. This involves building the set, shaping the studio lighting, and selecting the perfect backgrounds or backdrops.
Post-production: often the most misunderstood phase, this encompasses everything that happens after the shutter clicks. Using advanced editing software like Adobe Lightroom and Photoshop, we refine and perfect the raw images.
When it comes to high-end retouching, this final phase is incredibly meticulous and often demands significantly more time from the photographer than the actual photoshoot itself.
Managing different materials in product photography
Every material reacts differently to light, presenting unique challenges that must be solved at a pixel-level during post-production. Here is how we handle some of the most common surfaces in industrial and commercial product photography:
Fabrics, clothing, and leather goods
When photographing apparel, shoes, or bags, we face two main obstacles: dust and unwanted creases. While dust is a universal challenge, the porous nature of fabrics makes them a magnet for microscopic particles.
When we illuminate a product with studio flashes, even the tiniest speck of dust, that is completely invisible to the naked eye, catches the light, becomes brilliant, and stands out aggressively in the frame. Yet, we cannot simply avoid using flash. Studio lighting is what allows us to control contrast, build dimensionality, and emphasize the rich texture of a surface.
However, highlighting texture also means accentuating micro-creases and tiny surface imperfections that only become visible under intense, directed light. Furthermore, products made of multi-material components often reveal minor manufacturing flaws under commercial lighting, such as frayed stitching or transparent glue residue. Post-production allows us to seamlessly clean up these imperfections, leaving a flawless final image.
Matte plastics
Fortunately, not every material is a battleground. Matte plastic surfaces are generally the most accommodating. They absorb light beautifully, rarely produce distracting or harsh reflections, and behave predictably on set if thoroughly dusted before the shoot. If we are capturing extreme close-ups, minor scuffs or molding lines may appear, but these are easily corrected in post-production.
Case study: high-end wine photography
One of the sectors we have specialized in heavily over recent years is wine photography. Photographing bottles is notoriously complex, so much so that we have dedicated specific case studies to the topic.
A high-end commercial bottle shot is rarely a single photograph. Instead, it is the result of a digital composite built from multiple exposures. Because a wine bottle is made of highly contrasting materials (like reflective glass, matte or textured paper labels, foil caps, and liquid) a single lighting setup cannot correctly illuminate every element simultaneously.
When dealing with glass, the primary challenge in post-production is correcting irregular reflections caused by structural imperfections in the bottle itself. Industrial glass often features minor waves or dents that warp studio light, creating distorted, unappealing reflections. Straightening these light reflections, smoothing out gradients, and balancing highlights are the key interventions required to deliver a pristine, premium bottle image.
The ultimate challenge: curved reflective surfaces
The most elusive and demanding surfaces to photograph are concave or convex reflective materials, such as polished metals or chrome. Reflective surfaces do not have a visual identity of their own, they simply mirror the environment around them.
If you eliminate all reflections, the material looks completely flat and matte. Conversely, if you don’t control the environment, the object will reflect the entire studio, including the camera and the photographer. High-end post-production is essential here to sculpt the reflections digitally, ensuring the image accurately represents the true premium texture of the material while maintaining a clean, organized, and elegant aesthetic.
Reshaping and color accuracy: the final touches
Before we consider a commercial image complete, we perform two final, critical adjustments:
Reshaping
This process involves checking and refining the contours of the product. We digitally smooth out minor dents, asymmetry, or misalignments that might look unharmonious from the specific camera angle chosen for the shoot. These subtle adjustments heavily influence the viewer’s perception of premium quality.
Color accuracy and management
This is an essential yet frequently underestimated pillar of commercial photography. To ensure that the product’s color on screen or in a printed catalog matches the physical item exactly, we manage color consistency throughout the entire workflow. This requires using calibrated hardware, from custom color profiles during capture to high-end, hardware-calibrated monitors during editing.
Final thoughts
We hope this breakdown clarifies some of the technical terms we frequently use and sheds light on why professional post-production is such a significant factor when quoting a commercial photography service. It is the invisible craft that elevates a standard photograph into a powerful marketing asset.
You can explore examples of our product photography with high-end post-production in our Still Life portfolio and our dedicated E-commerce Photography section. You will also find some striking before-and-after material comparisons at the bottom of this post.

Before: Unretouched shot showing irregular reflections caused by minor imperfections in the glass.

After: Post-production featuring glass reflection management, spot correction, and clean, defined outlines.
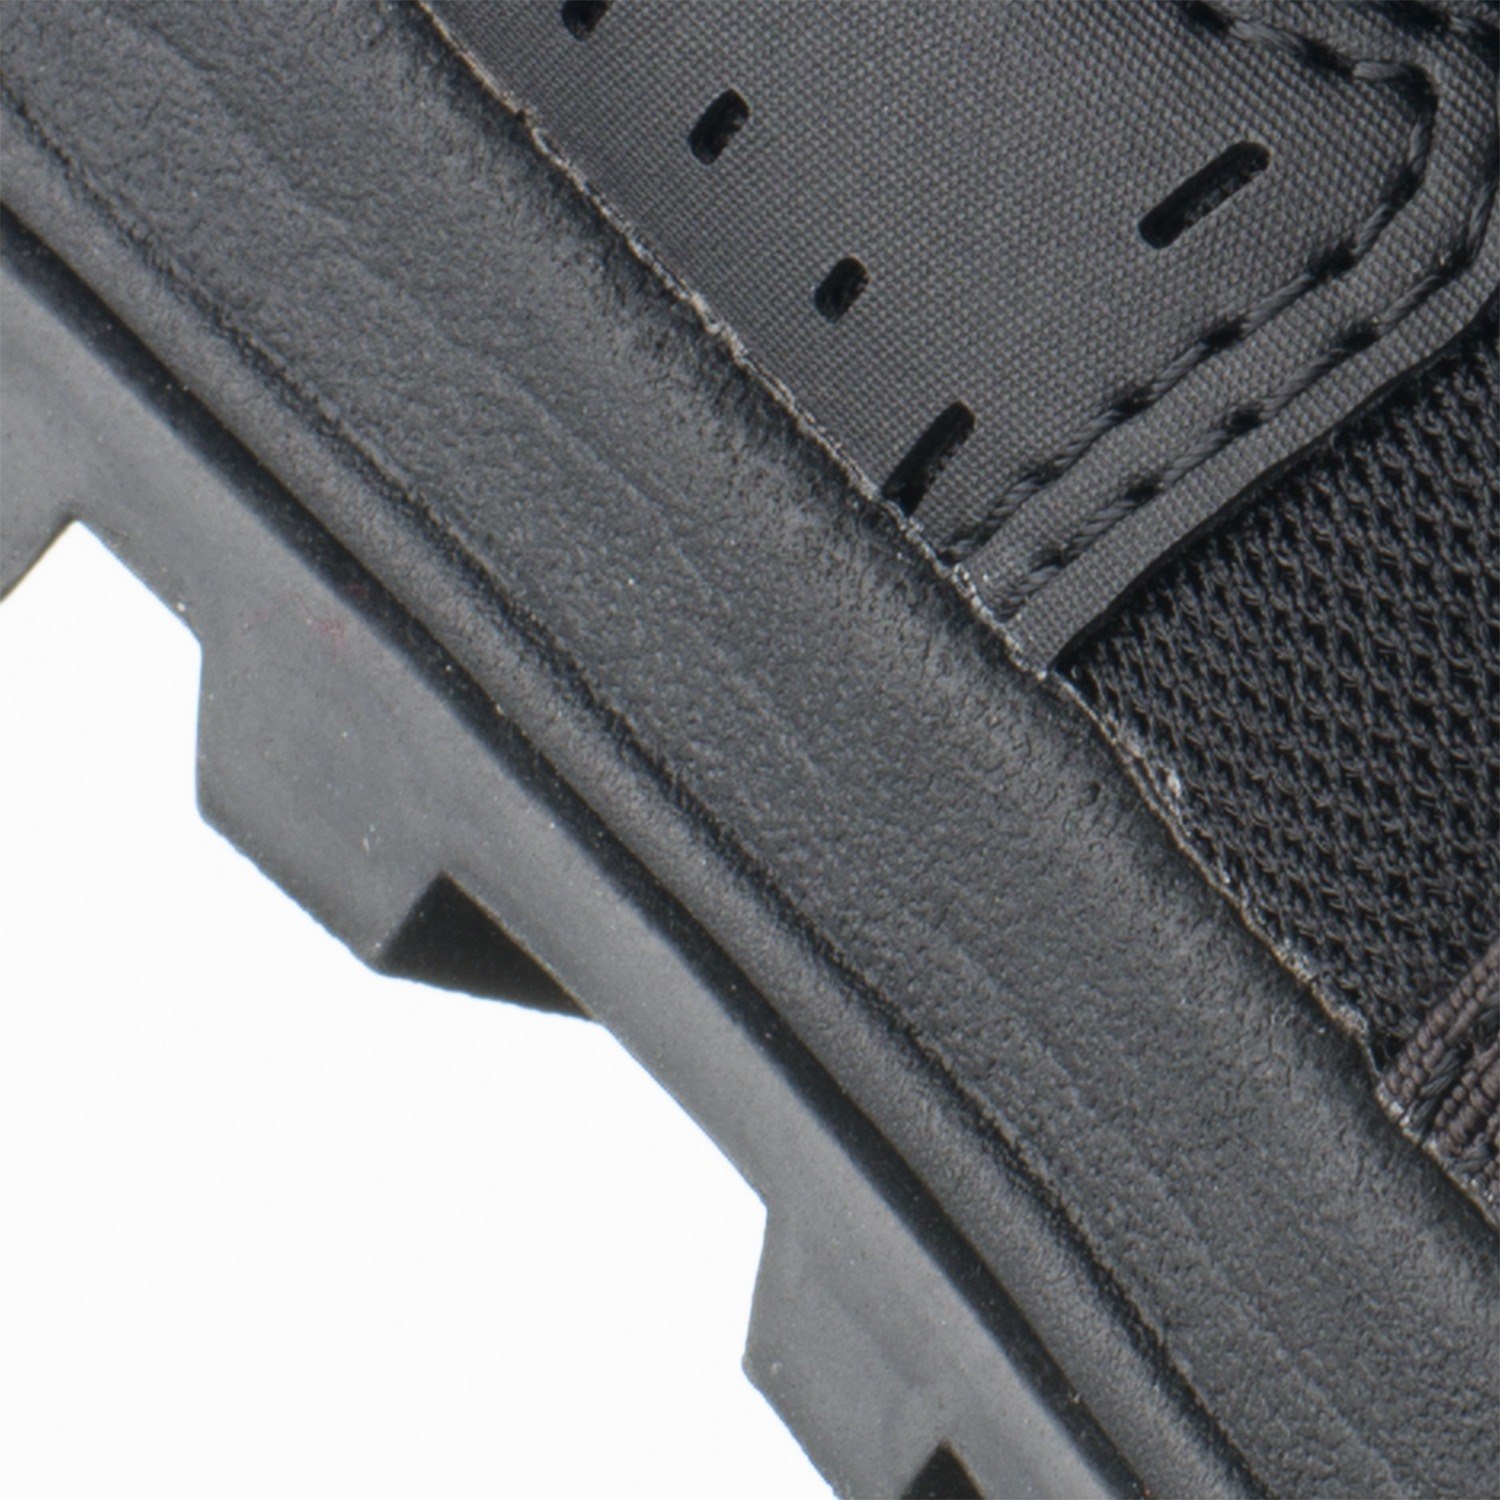
Before: Unretouched shot showing minor rubber imperfections and glue seepage at the material joints, highlighted by the flash.

After: Post-production featuring the removal of material imperfections, reconstruction of the joint lines, and clean-up of the glue residue.

Before: Unretouched shot showing rubber imperfections and tiny dust specks highlighted by the flash.

After: example of post-production with dust removal and correction of minor imperfections.

Before: Unretouched shot showing fabric creases and the resulting uneven light and shadow patterns

After: Post-production featuring crease removal and adjustments to create smooth, even tonal values.

Before: Raw studio capture with natural dust, micro-creases, and surface imperfections.

After: post-production example showing dust removal and imperfection correction.